Welcome to Science Time Kid Zone!

Welcome to science ideas and activities for kids of all ages.

Tuesday, December 3, 2013

Happy Birthday to Rowland Hill - Inventor of postage stamp

The holidays are fast approaching and we all look forward to mailing our gifts. What is the last thing you do once you have a package ready for mailing a gift at the post office? Affix a postage stamp of course!
Ever wondered who invented the postage stamp? And what did the first postage stamp look like? Read on.
Rowland Hill photo cleaned.jpg
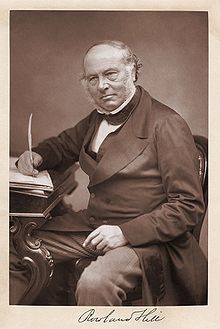
This is Sir Rowland Hill who was born on December 3, 1795 in England at a place called Worcestershire. Those were the days when mail was carried by runners or on cycles and wagons and delivered by hand for a fee. So mail delivery had too many problems such as getting lost, being very slow, difficult to trace and then no proper fee system which would make it sometimes very expensive as per the wishes of the deliverer. So what did Sir Hill do? He created the system we see today in post offices across the world and in 1840, he created the world's first adhesive postage stamp that cost one penny.

Tuesday, July 16, 2013

Build a Solar Oven

Summer time is the perfect time to put those sun's rays to work.  Go to"build a solar oven" for directions.  Included is another link for recipes.  Happy cooking!

Sunday, June 9, 2013

Chemistry in the Kitchen...Acids and Bases


Next time you go to the grocery store, pick up a red cabbage for a little science fun with acids and bases.  Red cabbage (which actually is purple) makes an excellent indicator.  That means it reacts to acids and bases in a way that is easy to measure.
Step 1  Prepare your indicator
There are several ways you can prepare your indicator.
Method 1:  Chop one-fourth of a head of cabbage into a few big pieces. (I use the bottom part and any parts that might be thrown away.)  Put the cabbage in a pan with 3 to 4 cups of water.  Boil until the cabbage is pale and without color.  Water should be purple. Strain out cabbage. Let the liquid cool.
***You can use the indicator as a liquid or use it as a dye for coffee filters or card stock to make indicator paper.  The down side is you have to let it dry before using.
Method 2:  This makes quick liquid indicator.  The results will be blue not purple.  It will work but not as well.  To make, coarsely chop one third to one fourth of a head of cabbage.  Fill a blender one half full of cabbage.  Add enough water to just cover the cabbage.  Coarse blend for 1 minute until water becomes dark blue.  Strain out cabbage.  Repeat process for more liquid indicator.
Note: This method will not work as well as the first method but will still get results.
Method 3:  (this is my preferred method...it is less work to prepare and clean.  Also, I like that kids are involved in creating the indicator). You will need (1)  a piece of cabbage (about 1/3  to 1/4 of a leaf, also the thicker the easier to handle) (2) a piece of  card stock or an index card (you can use regular paper but it may tear. (3) some q-tips
Rub the cabbage on the card until you have most of the card purple.  You will need to rub very hard.
Step 2  Collect your substances to test
Suggested substances are: bar soap, liquid soap or shampoo, vinegar, window cleaner, lemon juice or other citrus
Step 3 Test your substances


Thursday, May 23, 2013

Red Eared Slider Turtles


Sunday, January 27, 2013

DRY ICE SHOW

If you are interested in presenting a dry-ice demonstration, an excellent place to start is by visiting Steve Spangler Dry Ice Demo.  This website has free demonstrations and directions, and resources for purchase. A favorite dry ice demonstration is the crystal ball. This is an easy but high audience thriller demonstration.
Locally, I get my dry-ice from Air-gas.  Call in advance to find out times for pick-up and minimum purchase requirements.  Make sure you also purchase some leather work gloves for safety.
On the day you pick up your dry ice, be sure and take a cooler.  Wrap the bag of dry ice in layers of newspaper to insulate it. Try to buy the dry ice  on the day you will need it.  I had to get mine the day before but bought extra to allow for loss overnight. Usually $10 worth is plenty for a day's worth of demos.
Safety precautions:
Do not store your dry ice in a refrigerator!
Crack the windows in your car while transporting dry ice.  As it sublimates, it releases carbon dioxide into the air.
To see the demo, click on Dry Ice Demo above or go to the Steve Spangler website listed on the right under Science Fun.

Thursday, November 29, 2012

WORMS! WORMS!WORMS!

Diary of a Worm  is over but your worms still need care.  Remember the following:
1.  Worms like it damp but not wet.  If your worm home gets too wet, gently turn your container upside down (with lid firmly on!) and have a parent poke a few holes in the bottom lie the ones in the lid.  Set it back- bottom side down and set the container on an old container to catch draining water.  Then add some more DRY shredded newspaper to absorb some of the extra moisture.
2.  Add some extra dirt, one tablespoon full should do it for your small container.  Make sure it does not have chemicals in it.  Ask your parents. Worms need dirt to help them eat food.
3.  Feed your worms correctly.  It doesn't take much food.  If you still see food scraps then don't add more.  When you add food, just a little does it.  For just a few worms, chop up a big spoonful of RAW, UNCOOKED  fruit and vegetable scraps...no citrus like lemons and no onions or garlic. 
NEVER give your worms meat, dairy or grease!
4.  Worms like it dark.  Wrap some dark paper around he outside of your container.
Two red worms mating
5.  Not too cold or hot! Keep your container inside and away from hot things.  In the spring you can set them free in your garden if you want.
6.  If you see two worms together, leave them alone.  They are making babies.
7.  If you see a lot of black soil, that's worm poop and it is great food for your plants. Gently remove it and put it in your flower pot.  Your plants will love it!

Any questions?  Send it in the comment box below.
I hope to see you at our next Story Lab Snowflake Bentley.  Find out more by opening the Story Lab tab above.


Tuesday, August 7, 2012

MARS ROVER LANDS SAFELY ON MARS!

August 6th marks a new future for our space program. Mars rover Curiousity safely landed on Mars to begin a two-year mission.  (go to Science Sharing page for more on Curiousity)

Sunday, August 5, 2012

PERSEID SHOWERS PEAK AUGUST 11 -13

While you might spot a meteor any day this month, your best chance is 11 pm to dawn Saturday, the 11th and Sunday, the 12th. During this time, you might see an average of a meteor a minute. Lay down in a reclining lawn chair or on a blanket and look up at a dark part of the sky with a wide open view. I like to lay on my driveway to avoid the dew on the grass. You may see streaks that are white or green. HAPPY HUNTING!

THE METEORS ARE HERE!

August means starting school for many of us, but for everyone around the world, it is the month of the Perseid Meteor showers. Meteors, sometimes called Shooting Stars, look like bright streaks of light across the sky. We can’t see them during the day because the sun is too bright. This year should be a good year for seeing meteors because the moon is in its waning crescent phase, which means a darker sky. The source of the shower is Comet Swift-Tuttle. Both Earth and the comet orbit (move in a path) around the Sun. Although the comet is nowhere near Earth, bits of the comet's tail gets in Earth's orbit. These tiny bits of comet dust hit Earth's atmosphere traveling 132,000 mph creating bright streaks of light as they burn. Because Swift-Tuttle's meteors fly out of the constellation Perseus, they are called Perseids. For more information and pictures open the Space link: Meteors: Great Perseids-NASA Science.

Snowflakes Forming

Science of Snow

Largest Bat

Largest Bat
Largest Species of Bat in World

Yakko's Universe Song

Total Pageviews